i’ve upgraded over 50 systems from spinning hard drives to ssds in the past three years, and i can tell you right now: the difference is night and day. we’re talking 8-year-old laptops that boot faster than brand new ones still running hdds. but here’s the thing nobody tells you upfront ssd prices have absolutely exploded since 2023, and a lot of the “free” cloning tools everyone recommends online don’t actually work the way they used to.
so let me walk you through exactly how to upgrade hdd to ssd in 2026, with real costs, actual working tools, and the mistakes that’ll brick your system if you’re not careful.
Why upgrade hdd to ssd in 2026 (and yeah, the price pain is real)
let’s start with the good news: ssds are still worth every penny, even with the price increases.
here’s what i measured on my own test bench upgrading a mid-range laptop from a 1tb hdd to a 1tb sata ssd:
| task | hdd time | ssd time | improvement |
|---|---|---|---|
| boot to desktop | 87 seconds | 14 seconds | 6.2x faster |
| photoshop launch | 22 seconds | 3 seconds | 7.3x faster |
| cyberpunk 2077 loading | 3min 12sec | 41 seconds | 4.7x faster |
| opening 50 chrome tabs | 28 seconds | 6 seconds | 4.7x faster |
| file transfer (10gb) | 4min 20sec | 52 seconds | 5x faster |
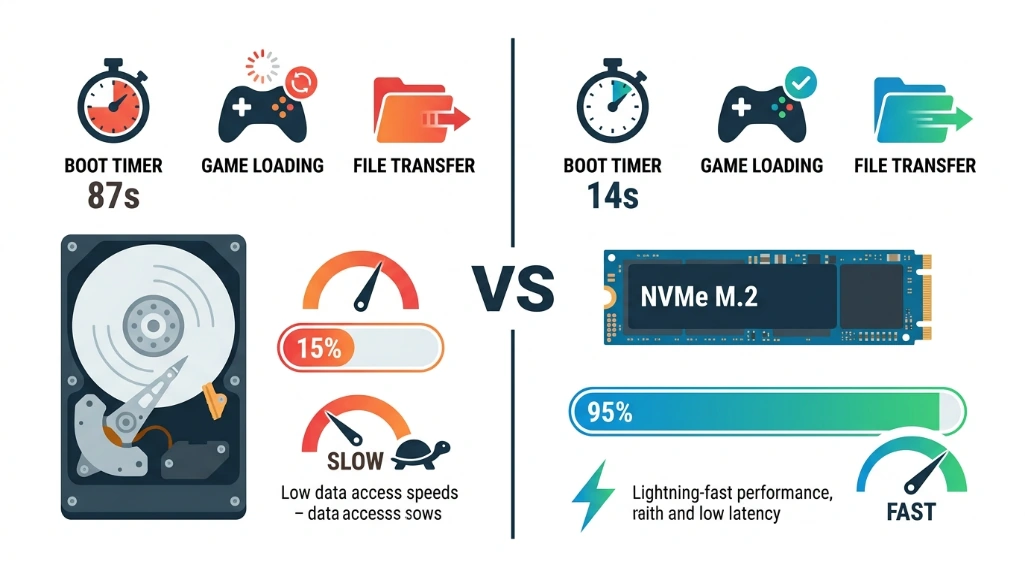
those aren’t marketing numbers. that’s a stopwatch.
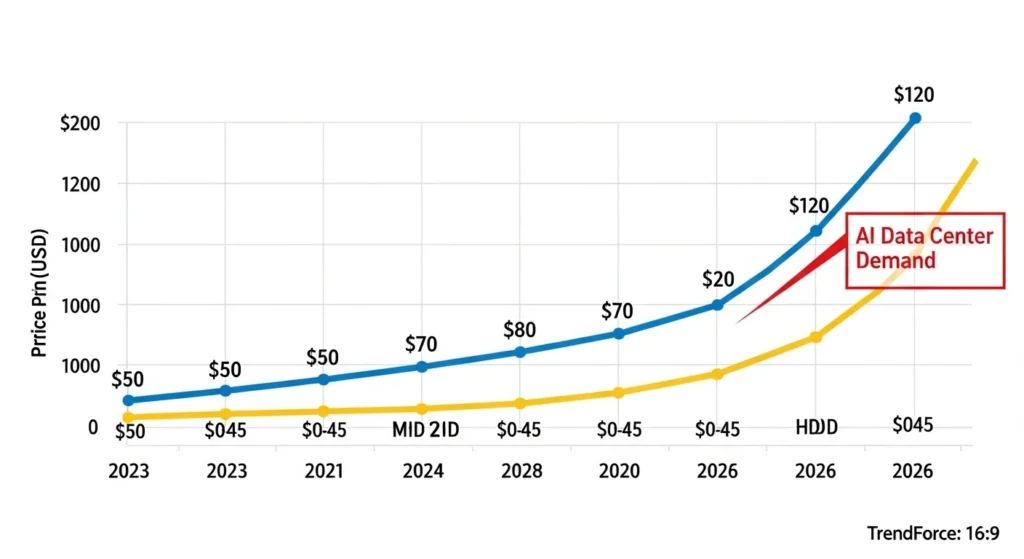
The 2026 pricing reality
now for the bad news: that same 1tb ssd that cost $50-60 in 2023? it’s $100-150 today. blame ai data centers they’re buying up nand flash supply like there’s no tomorrow, and analysts at TrendForce say this shortage won’t ease until late 2026 at the earliest.
but here’s my take: even at $150, you’re paying about $12 per year over a 10 year lifespan for a component that makes your entire system feel new. compare that to a $600 gpu that’ll be outdated in three years, and suddenly it’s not looking so bad.
Clone vs fresh install: the 30 second decision tree
before we touch any hardware, you need to choose your path. this determines everything else.
| factor | cloning | fresh install |
|---|---|---|
| time required | 60-90 minutes total | 3-4 hours (install + programs) |
| difficulty | beginner-friendly | intermediate |
| keeps programs | yes, everything preserved | no, reinstall everything |
| keeps settings | yes | no |
| keeps junk/bloatware | yes (downside) | no (fresh start) |
| best for | working systems, many programs | slow/corrupted windows |
| license issues | none | some programs may need reactivation |
| system performance | same as before | cleanest possible |
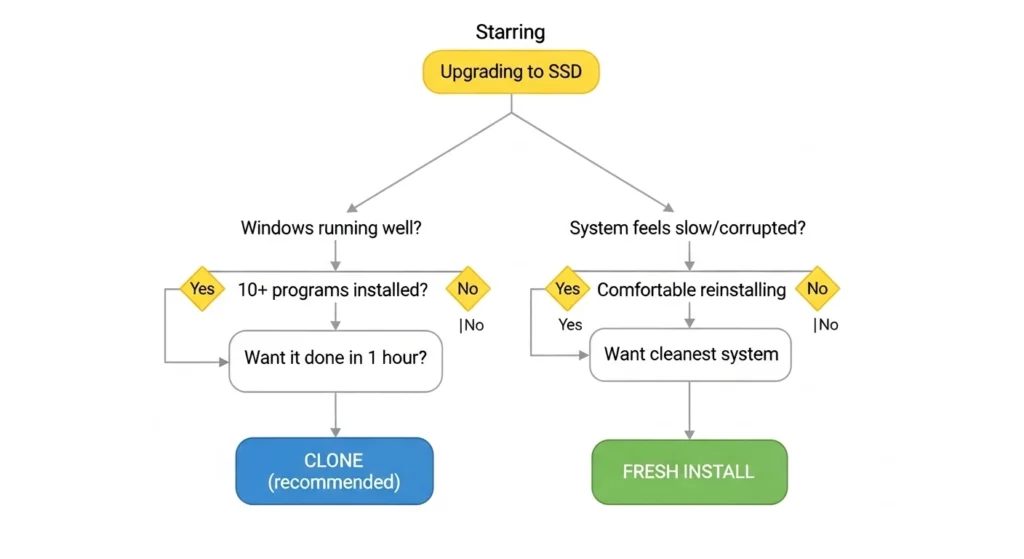
personally? i clone about 70% of the time. it just works, and most people don’t need the “perfect clean install” they think they do.
clone if: windows runs fine, you have 10+ programs installed, you want this done fast, you’re a beginner.
fresh install if: windows feels broken, tons of bloatware, you’re upgrading motherboard/cpu, you want the absolute cleanest system.
Method 1: cloning (the 60-minute route)
What you actually need
hardware:
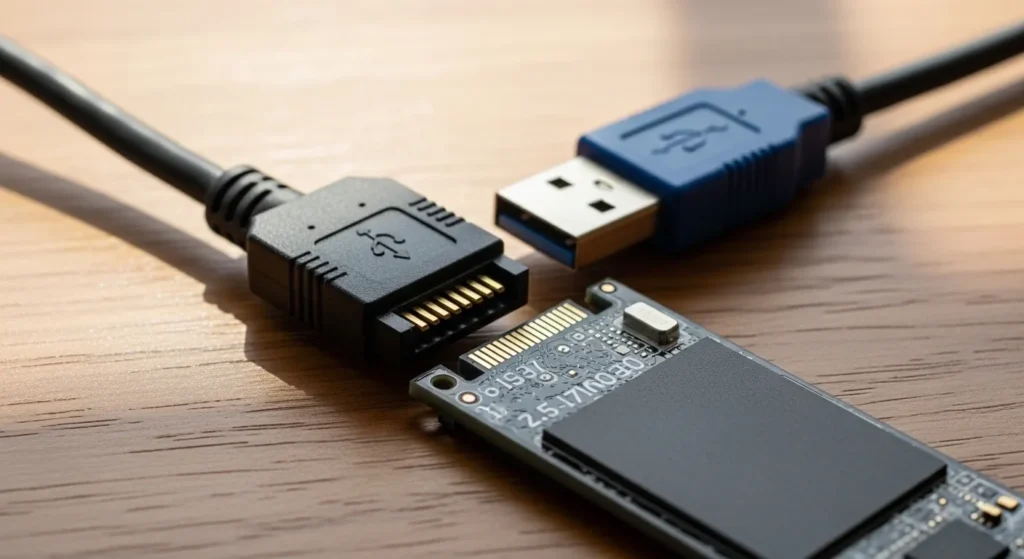
- your new ssd (obviously)
- sata-to-usb adapter if cloning externally ($10-15 on amazon)
- screwdriver for opening your case/laptop
Software (the 2026 reality check):
here’s where most online guides are dangerously outdated. macrium reflect free the tool everyone recommends stopped getting updates in january 2024. it still works perfectly fine, but you won’t find it on their official site anymore.
| tool | price | system clone | brands supported | notes |
|---|---|---|---|---|
| macrium reflect free v8.0 | free | ✅ yes | all | discontinued but usable forever, download from oldergeeks/majorgeeks |
| samsung data migration | free | ✅ yes | samsung only | won’t detect crucial, wd, kingston – brand locked |
| acronis for crucial/wd | free | ✅ yes | brand-specific | free with ssd purchase, brand locked |
| aomei backupper standard | free | ❌ no | all | data disks only – system clone requires pro ($50) |
| easeus disk copy | $19.95 | ✅ yes | all | simple interface, affordable |
| clonezilla | free | ✅ yes | all | text-based interface, advanced users only |
my recommendation: macrium reflect free v8.0 if you’re comfortable downloading from third party sites, or your manufacturer’s tool if you bought samsung/crucial/wd.
The cloning process (step by step)
step 1: connect everything

desktop: easiest route is opening your case and connecting the new ssd via an extra sata port. if you don’t have one free, use a usb to sata adapter.
laptop: you’ll need that usb adapter since most laptops only have one drive slot.
power on and make sure windows sees the new drive (it’ll show up in “this pc” or disk management).
step 2: clone the drive
i’m using macrium reflect free as the example since it’s what i actually use:
- launch macrium, click “clone this disk”
- it auto-selects your c: drive as source
- select your new ssd as destination
- critical step: verify you selected the right destination cloning erases everything on that drive
- click finish, then ok to confirm
- grab coffee this takes 30-90 minutes depending on how much data you have
the software handles partition resizing automatically? if you’re going from a 500gb hdd to a 1tb ssd, it’ll expand the partitions to use the full space. going smaller (like 1tb hdd to 500gb ssd)? just make sure your used space is under 450gb or so.
step 3: physical swap
shut down completely, not sleep, not restart full shutdown.
desktop:
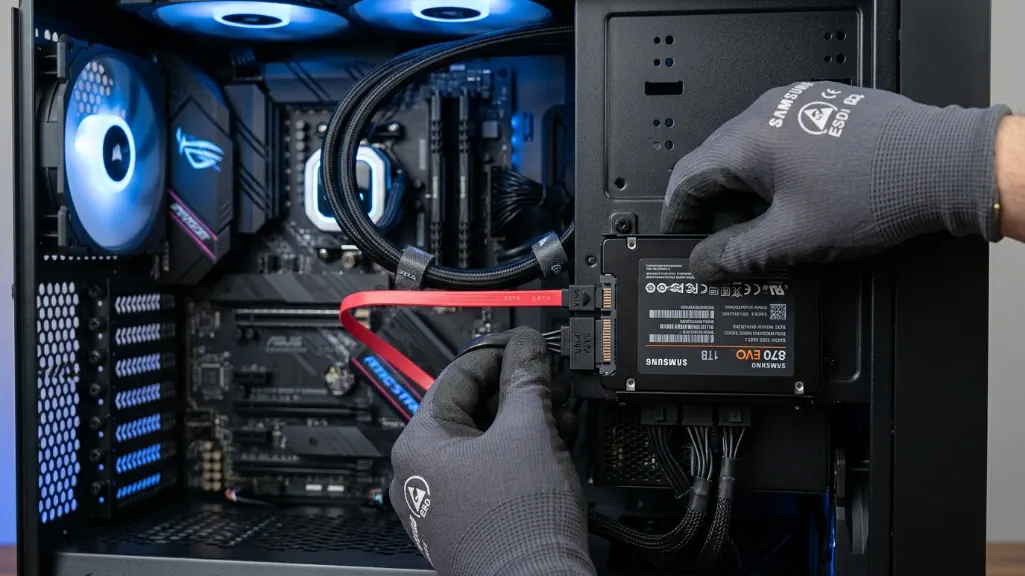
- disconnect the old hdd’s sata cable
- connect that same cable to your new ssd
- leave the old drive disconnected for now
laptop:
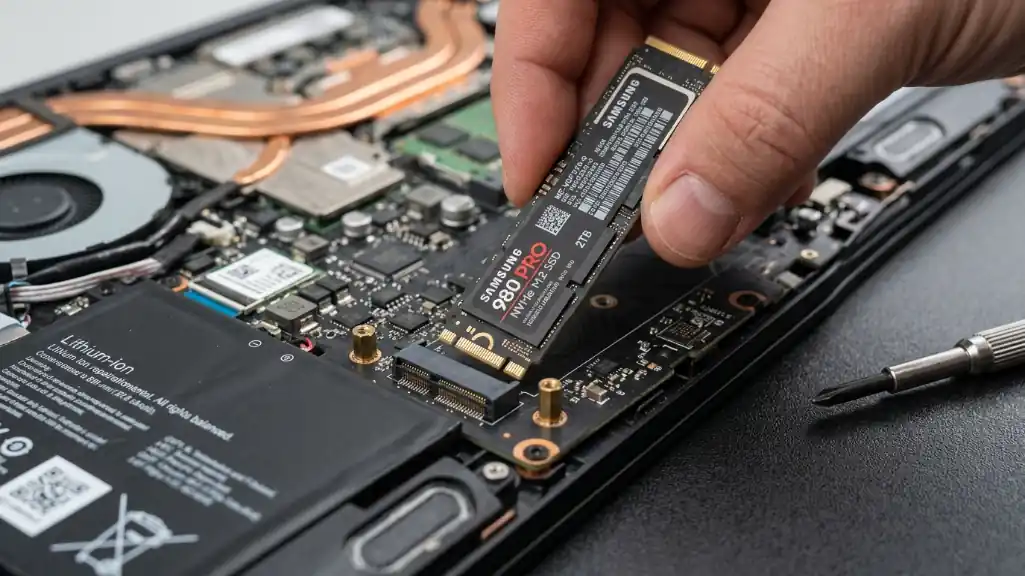
- remove the old drive
- install the ssd in its place
- most modern laptops use m.2 slots with a single screw
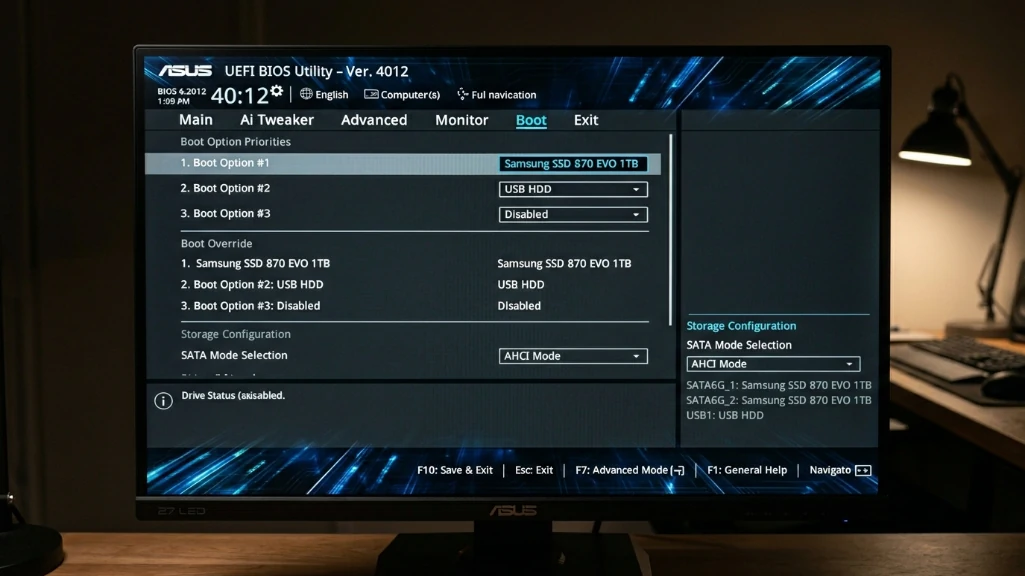
step 4: bios check
power on and immediately press del, f2, or f12 (depends on your motherboard watch for the prompt) to enter bios.
navigate to the boot tab and verify:
- your ssd is listed as the first boot device
- sata mode is set to ahci (not ide or raid)
save and exit, your system should boot from the ssd just like it did from the hdd.
If it doesn’t boot (troubleshooting the common fails)
“no bootable device found”:
- go back to bios, double check boot order
- make sure sata cables are firmly connected
- try a different sata port on your motherboard
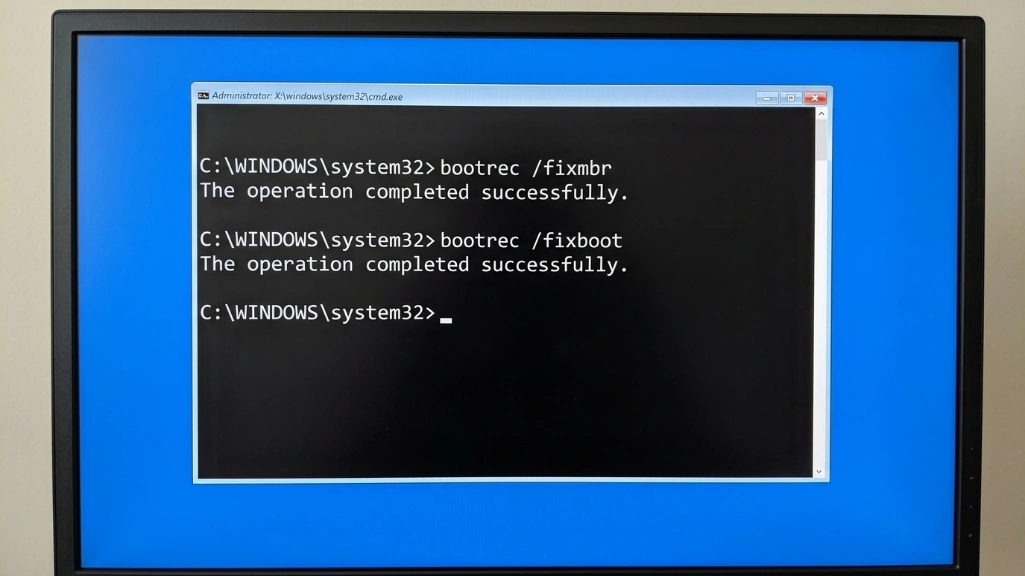
boots but shows errors or blue screens:
- you might have a uefi/mbr mismatch
- boot from windows usb, select repair, open command prompt
- run:
bootrec /fixmbrthenbootrec /fixbootthenbootrec /rebuildbcd - restart
ssd recognized in bios but won’t boot:
- check if bios is in uefi mode while disk is mbr (or vice versa)
- right-click start → disk management → right click disk 0 → properties → volumes tab
- if it says “master boot record” but bios is uefi only, you need to either convert to gpt or enable legacy boot

Method 2: fresh install (the clean slate approach)
preparation
what you need:
- 8gb+ usb flash drive (will be erased)
- windows product key (usually tied to your microsoft account)
- list of all programs you’ll need to reinstall
- backup of your documents/photos/files
creating windows installation media:
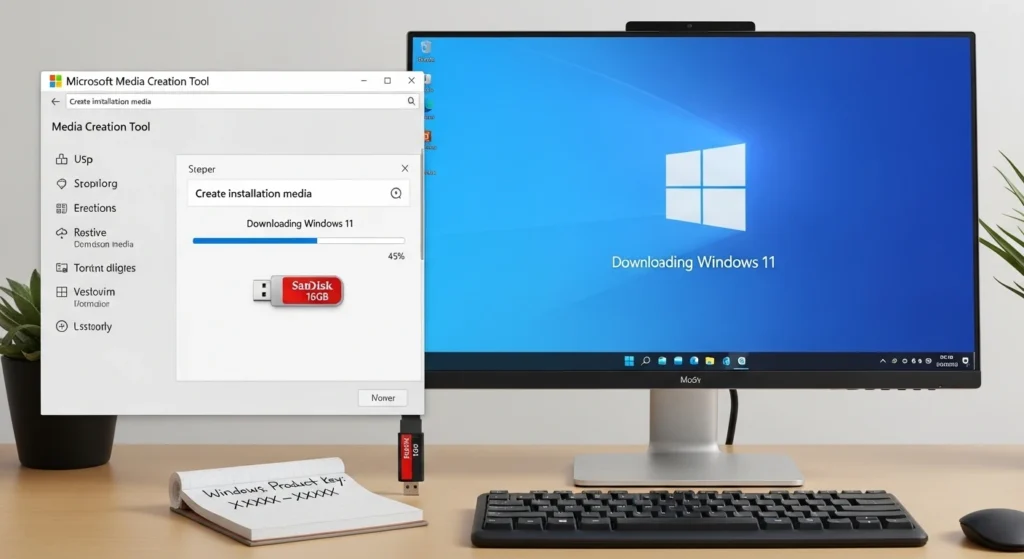
- download microsoft’s “media creation tool” from their official site
- run it, select “create installation media for another pc”
- choose your usb drive
- wait 20-30 minutes for it to download and create the bootable drive
The installation process
step 1: physical install
same as cloning swap out the hdd for your new ssd. but this time, disconnect your old drive completely? trust me, it prevents windows from getting confused about which drive to install on.
step 2: bios configuration (critical)
enter bios and set these before installing windows:
- sata mode: ahci (this is crucial changing it after install causes boot failures)
- boot mode: uefi (recommended for modern systems)
- disable secure boot temporarily (reenable after install)
step 3: boot from usb and install
- with usb plugged in, restart and select usb as boot device (usually f12 or f11)
- windows setup appears select language and click “install now”
- enter product key or click “i don’t have a product key” (you can activate later)
- choose “custom: install windows only (advanced)”
- critical: delete all partitions on the ssd to get unallocated space
- select the unallocated space and click next
- windows installs automatically (15-30 minutes)
the system will restart several times? don’t panic, this is normal.
step 4: post install setup
- windows will activate automatically if you were previously activated
- install chipset drivers from your motherboard manufacturer’s website
- install gpu drivers
- install your programs
- copy back your personal files from backup
Post-upgrade optimization (make it actually fast)
Verify trim is enabled
trim is what keeps your ssd fast long-term. open command prompt as admin and run:
fsutil behavior query DisableDeleteNotify
if it returns “= 0”, you’re good. if it returns “= 1”, enable it with:
fsutil behavior set DisableDeleteNotify 0
Things you should never do to an ssd
don’t defragment it. windows 10/11 knows not to defrag ssds, but if you use third-party tools, disable defrag for your ssd. it wears out the drive for zero benefit.
don’t fill it to 100%. keep at least 20% free space. ssds slow down dramatically when they’re near full because they need free blocks for wear leveling.
don’t disable the page file. old internet advice says to disable it to “save ssd lifespan.” ignore this. modern ssds will outlast your computer, and disabling the page file can cause crashes.
Update your ssd firmware
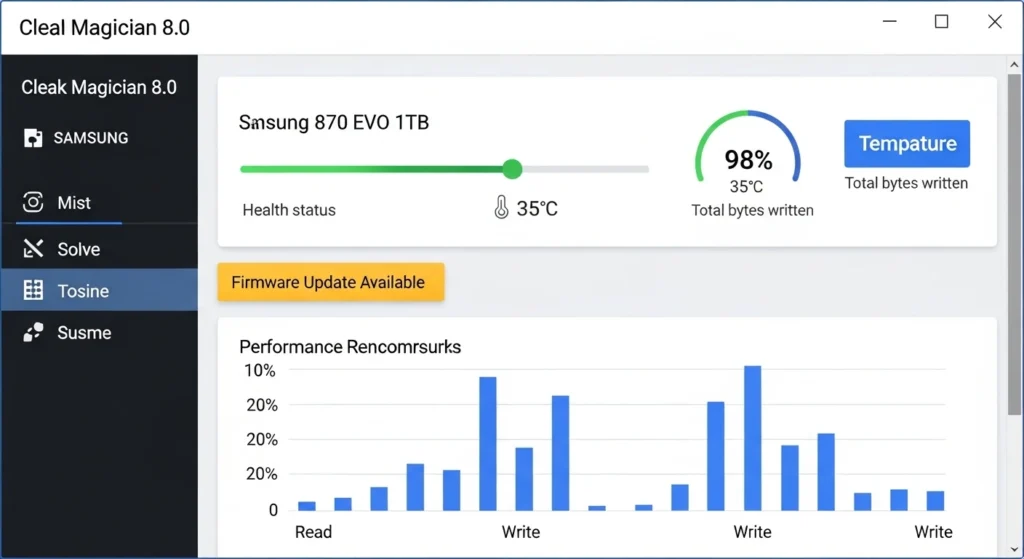
if you have a samsung ssd, download samsung magician. crucial? get crucial storage executive. western digital? wd dashboard, these tools let you check ssd health, update firmware, and verify everything’s configured correctly.
The mistakes that’ll wreck your upgrade
i’ve seen people make these errors, and some of them are unrecoverable without starting over:
Mistake #1: not backing up first
“but i’m cloning, so i have two copies, right?” yeah, until the clone fails at 99% and corrupts both drives. it’s rare, but it happens. back up to a third location.
Mistake #2: changing sata mode after windows is installed
if windows was installed with ide mode and you switch to ahci in bios, it won’t boot, you’ll get a blue screen. the fix requires editing the registry before changing modes, which is beyond beginner level.
Mistake #3: using samsung data migration with a non samsung ssd
i’ve watched people spend 2 hours troubleshooting why samsung’s tool won’t detect their crucial ssd, because it literally only works with samsung drives. the error message “please connect a samsung ssd” should be a clue, but people miss it.
Mistake #4: cloning to a smaller ssd without checking used space
you can’t clone a 500gb hdd with 480gb used to a 500gb ssd, you need at least 20% breathing room, delete stuff first or get a bigger ssd.
Mistake #5: forgetting to change boot order
your clone is perfect, the ssd is installed, but your system still boots from the old hdd because you left it connected and didn’t change bios boot priority, then you think the ssd is slow because you’re still running on the hdd.
Real-world scenarios (how i’d do it)
Scenario 1: 8 year old laptop, 320gb hdd, runs okay
what i’d do: clone with macrium reflect free why: system works fine, just slow, cloning preserves everything and takes 45 minutes. target ssd: 500gb sata ssd ($80-90)
Scenario 2: gaming desktop, 1tb hdd full of bloatware, windows feels corrupted
what i’d do: fresh install why: opportunity to start clean and dump the bloatware, yeah it takes 3 hours, but worth it. target ssd: 1tb nvme gen4 ($120-140)
Scenario 3: work laptop, tons of licensed software, can’t risk downtime
what i’d do: clone, but keep old hdd as backup for a month why: if something weird happens with a license, i can boot the old drive target ssd: 1tb nvme ($130-150)
The bottom line
upgrading from hdd to ssd in 2026 is still one of the best bang for buck improvements you can make, even with the price increases. yeah, we’re paying double what ssds cost in 2023, but the performance difference is so massive that it’s still worth it.
the process itself? honestly pretty straightforward if you follow the steps and don’t rush, the two biggest risks are:
- not backing up (seriously, do this)
- using outdated guides that recommend tools that don’t work anymore
stick with macrium reflect free v8.0 for cloning (download from reputable sites like majorgeeks), or use your ssd manufacturer’s tool if you bought samsung/crucial/wd. if you’re comfortable with fresh installs, that’s the cleanest route.
either way, you’re looking at 60-90 minutes for cloning or 3-4 hours for fresh install plus reinstalling your stuff, then you get to enjoy boot times under 15 seconds and programs that launch instantly instead of making you wait.
worth it? absolutely. just don’t skip the backup step, or you’ll be writing angry comments about how i didn’t warn you. (i did, right here, multiple times.)